


OSRS Zerker Pure Guide
14.07.2024 - 12:26:43
Game Guides , OSRS Guides , OSRS PvM , OSRS PvP , OSRS Quests & Achievements , OSRS Skills & Skilling , Runescape

If you want to try something new in OSRS, then you might want to create a new account that offers a different playstyle and a whole new level of challenge. While there are lots of builds to consider in OSRS, one of our favorites is the Zerker Pure. Here’s a guide on how you can make an account like this in the game. But first, let’s talk about what a Zerker Pure is.
What Is A Zerker Pure?
Zerker Pures typically have a Defence level of 45. This is just enough for you to wear the berserker helm which is the star of this build, hence the name. As with all Combat Pure builds, this one is characterized by keeping most of the combat levels low to ensure that you’re able to dominate within a certain PK’ing level.
Where To Get Berserker Helm
The only quest requirement for the Berserker Helm is The Fremennik Trials aside from the Defence level requirement of 45. You can get the helmet from the Skulgrimen’s Battle Gear Shop for 78,000. If you don’t want to buy it or if you lack the gold for it, you can get it as a reward from Dagannoth or the Barbarian Assault High Gambles.
We’ll have a few quick tips for Barbarian Assault deeper into the guide.
One of the reasons why players love this build so much as that it’s a pure with the lowest Defence level that can use the Barrows gloves. There are a few other reasons why this is such a beloved build. If you’re on the fence about it still, here are a few pros and cons to Zerker Pures.
Zerker Pure Advantages
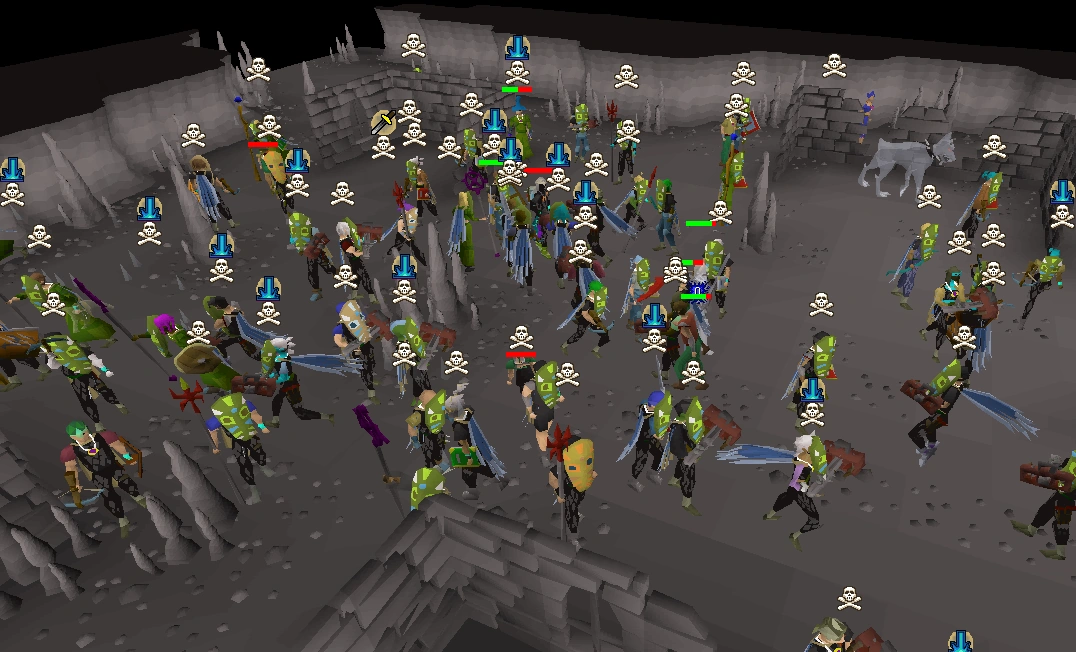
Effective PK’ing At 75 And Above - The Zerker Pure really shines once you hit level 75 Combat Level. Other Combat Pures struggle against this build so it makes endgame PvP a lot easier. It has high KO potential making it a must for those that love PvP.
Still Viable For Some PvE - Unlike most Combat Pures, Zerker Pures are still useable in some PvE content but not all of them. Those include the God Wars Dungeon, Wilderness bosses, and some Range.
Access To More Areas - Creating a Zerker Pure requires a lot more questing. This opens up more areas in the game which means training is a lot easier as well.
More Fun Than Other Pures - Thanks in part to being more versatile than regular Combat Pures, Zerker Pures are more fun to use since there’s less restraint in what you can access.
Switching To Other Builds Is Easier - Not every build though. However, Zerker Pures can quickly switch to Tanks and even a Barrows Pure account. If you want to, you can also easily switch this to a main account build.
Zerker Pure Disadvantages
More Time To Build - Zerker Pures are harder to build because there’s more questing involved to unlocked most of what you need fo the build. When it comes to building time and investment, lower level pures are definitely better.
Weak In Low-Level PvP - Unfortunately, Zerker Pures aren’t good for low-level PvP and you can only really start fighting with a chance once you hit 70 and above.
Higher Risk On Death - Zerker Pures are carrying a lot of great items so dying definitely isn’t an option when using this build.
Sample Build
Below is a sample set of gear you can wear for your Zerker Pure. Keep in mind that you can wear a variety of items to supplement this build. We just find these the best when it comes to maxing out DPS.
How To Build A Zerker Pure
Now, we’re going to teach you how to build your own Zerker Pure. This part is going to be cut into a few segments to give you a better understanding of what you need to do for this build.
Questing
Questing is an integral part of creating a Zerker account in OSRS. Majority of the things you need for this build will come from the quests below.
Keep in mind that these are just what’s basically the bare minimum for this build. Other than that, you should also do some quests which will help train the combat stats you’ll need for the Zerker build.
Lunar Spells
For Lunar Spells, you need to complete Lunar Diplomacy. The benefit of the lunar spells is that you get to use Vengeance, which requires level 94 magic. The Vengeance spell is very useful in PvP as it recoils 75% of the damage dealt by the other player's hit, similar to a ring of recoil.
If you have already quested for Barrows Gloves, the new quests needed are:
Lost City
Fremennik Trials
Rune Mysteries
Shilo Village (which requires Jungle Potion and Druidic Ritual)
You also need certain skill levels for lunar spells: 61 Crafting, 40 Defense, 60 Mining, 65 Magic, 25 Fletching, 55 Woodcutting, and 49 Firemaking. I really recommend that you do this because the lunar spells give you lots of spells that are really good for training skills. They can give you quick XP and a lot of time give you profit or let you break even while training magic.
Recipe for Disaster
You need 175 quest points for the final boss in order to complete Recipe for Disaster. To do Recipe for Disaster, you have to complete a long list of quests:
Goblin Diplomacy
Gertrude's Cat
Shadow of the Storm (which requires Demon Slayer and The Golem)
Monkey Madness (which requires Grand Tree and Tree Gnome Village)
Big Chompy Bird Hunting
Biohazard (which requires Plague City)
Murder Mystery, Nature Spirit (which requires Restless Ghost and Priest in Peril)
Witch's House
Fishing Contest
Legends Quest (which you only need to start, don't need the skill requirements)
Family Crest
Hero's Quest
Shield of Arrav
Lost City
Dragon Slayer
Merlin's Crystal
Shilo Village (which requires Jungle Potion and Druidic Ritual)
Underground Pass
Waterfall Quest
Desert Treasure (which requires Digsite, Tourist Trap, Temple of Ikov, Troll Stronghold, and Death Plateau)
Horror from the Deep (which requires Barcrawl).
The skills required to complete Recipe for Disaster are 70 Cooking (boostable), 59 Magic, 53 Thieving, 53 Fishing, 50 Mining, 50 Firemaking, 40 Crafting, 40 Smithing, 40 Range, 25 Herblore, 10 Slayer, 10 Fletching, 48 Agility, and 36 Woodcutting.
Combat Skills
Attack
This is the part of the guide where we talk about the combat skills required as a zerker or a rune pure. Some notable levels are 40 attack, which is the rune scimitar, 60 attack, which is the dragon scimitar and other dragon weapons, and 70 attack, which is the abyssal whip. In order to get attack levels as fast and quickly, we're going to be using the reference from the guide that I will leave in the description. Some attack XP quests are required that you do as a zerker master in pure and the yellow is optional.
You can look on the quest list: Monkey Madness, Grand Tree, Waterfall Quests, Tree Gnome Village, Death Plateau, Fremennik Trials, Underground Pass, and the Hero's Quest. If you do all of these required quests, your total XP will get you to 247 attack. If you do the green and the yellow quests, you will be getting 50 attack.
Defense
For defense, the green quests are required, the yellow is optional, and the light green is stuff that you would probably do but it's not required. For the required quests, you have Monkey Madness, Dragon Slayer, Nature Spirit, Hero's Quest, and Fremennik Trials. For the recommended quests, you have One Small Favour and In Search of the Myreque. If you do just the required quests and not the recommended ones, then you will get 42 defense. If you do the yellow and the recommended quests, you'll get 48 defense. Do not do all the optional quests. The XP of doing required plus recommended quests will get you to 42 defense.
Prayer
The required quests for prayer are Restless Ghost and Priest in Peril. If you do just these, you will get 18 prayer. If you do all except the higher prayer requirements at the bottom, you will get 33 prayer. An additional quest in red gives 15k defense XP, so you need to watch out for that one so you don't go over your defensive cap if you're shooting for a 45 pure, 42 pure, or a 40 pure.
Some prayer level milestones are: at 16 prayer, you get the Barrows Gloves and a 10% attack and strength boost. At 25 prayer, you get Protect Item. At 26 prayer, you get a 10% range boost. At 31 prayer, you get a 15% strength boost. At 34 prayer, you get a 15% attack boost. At 43 prayer, you get Protect from Melee. At 44 prayer, you get a 15% range boost. At 45 prayer, you get a 15% magic boost. At 52 prayer, you get Smite. Most zerkers will max out at 52 prayer. It is possible to max out at 53 prayer without getting a combat level if you have 99 everything except defense.
Essential Items
Ava's Accumulator
The requirements for Ava's Accumulator are Animal Magnetism, which requires 18 Slayer, Priest in Peril, Restless Ghost, and Ernest the Chicken quests. The benefits of Ava's Accumulator are that it picks up your arrows and darts as you use them and gives you a +4 range attack bonus, a +1 slash defense, and +4 magic defense.
Barrows Gloves
The requirements for Barrows Gloves are completing Recipe for Disaster. These gloves are the best in slot for a zerker pure, providing a +12 bonus in almost all attack stats and +12 in strength.
Fighter Torso
The Fighter Torso requires 40 defense and participation in Barbarian Assault. The defense bonuses are slightly lower than rune armor, but it provides a +4 strength bonus.
Fire Cape
The Fire Cape requires defeating Jad. You most likely will need 43 prayer and 70+ range to complete this task. This is the best in slot cape for a zerker or rune pure, providing +1 to all attack bonuses, +11 to all defense bonuses, +4 strength bonus, and +2 prayer bonus.
Prayer Books
Prayer books require completing Horror from the Deep. The Zamorak book is the best, followed by the Guthix book. The Zamorak book provides +8 to all attack bonuses and +5 prayer bonus.
Training Methods
Magic
For training magic, from level 1 to 55, you can train it any way you want. From level 55 and above, you can use High Alchemy and lunar spells. It's important to note that you can also train magic using PvM, Slayer, and PvP. There are many ways to train magic, so don't limit yourself to just one option. A great way is bursting at Ape Atoll.
Range
For training range, from level 1 to 70, you can use Sand Crabs. From level 70 to 99, you can use Nightmare Zone or chinning at Ape Atoll. You can also train PvM, Slayer, and PvP. Another option is to train at Sand Crabs until level 99. When training range, you should be using darts, the Magic Shortbow (imbued), or the Blowpipe.
Strength
For training strength, from level 1 to 75, you can use Sand Crabs. After reaching level 75 strength, you have a few options: you can train at Ape Atoll Giant Monkeys (which requires 43 prayer and Monkey Madness), Nightmare Zone AFK, PvM, Slayer, and PvP. Another option is to train at Sand Crabs until level 99.
Strategy For Zerker Pures
If you treat your Zerker just like any other character, you’re going to be wasting its potential. With that, here are a few things to keep in mind during your PvP sessions with this build.
Vengeance Timing
This is one of the most powerful spells when PKing with a Zerker Pure. You’ll have access to it under the Lunar spellbook. It has a high Magic requirement of level 94 but the grind is worth it.
Vengeance returns 75 percent of the damage done by your opponent’s next attack back to him and is a very effective way to increase your survivability in fights. To make full use of its potential, here are a few tips:
Wait For High Damage: Since the spell returns damage in percentages, it’s best to use it the time where you think your opponent is about to launch a big hit on you particularly using skills or equipment that can bring considerable physical damage.
Mind the Cooldown: Obviously, it’s impossible to spam Vengeance and if it was possible, that would make the spell overpowered. Make sure to always take note of the cooldown when using this spell and manage using it more properly.
Combo Potential: Use Vengeance to spike your total damage on a target while keeping yourself safe from any powerful attacks. The right usage of this spell will make your Zerker much more durable.
Special Attack
Special attack weapons are very important when it comes to taking out large chunks of the enemies’ health bar. Special attacks are basically your finishers during combat. Triggering them at the right time will finish fights quickly. Here are a few tips to consider.
Timing is Key: Your special attack should usually be used once your enemy’s shield is down and/or its health bar is significantly reduced. This makes the chances of a one-hit KO more possible
Beware of Vengeance: Do not be hasty in the use of your special attack right after your opponent has used Vengeance, as you might get damaged by the recoil. It’s very likely that they’re applying the same strategies as above.
Strategic Use: Even when your special attack is full, do not use it all at once which is also referred or ‘dumping spec’, it is more effective to use it as much as possible in the course of the fight at intervals relying on the direction the fight is taking.
Eating and Drinking
Aside from Vengeance, your best way at surviving fights is by managing your food and items properly.
Health Management: Try to control yourself and only use your items when your health is low. This makes it so that you don’t waste any of your items.
Cancel Attack Animation: Healing causes you to stop your attack animation and thus heal then quickly target the enemy to continue the attack.
Potion Usage: Take beverages to restore stats like Prayer or the fighting power to keep on warding off aggressors.
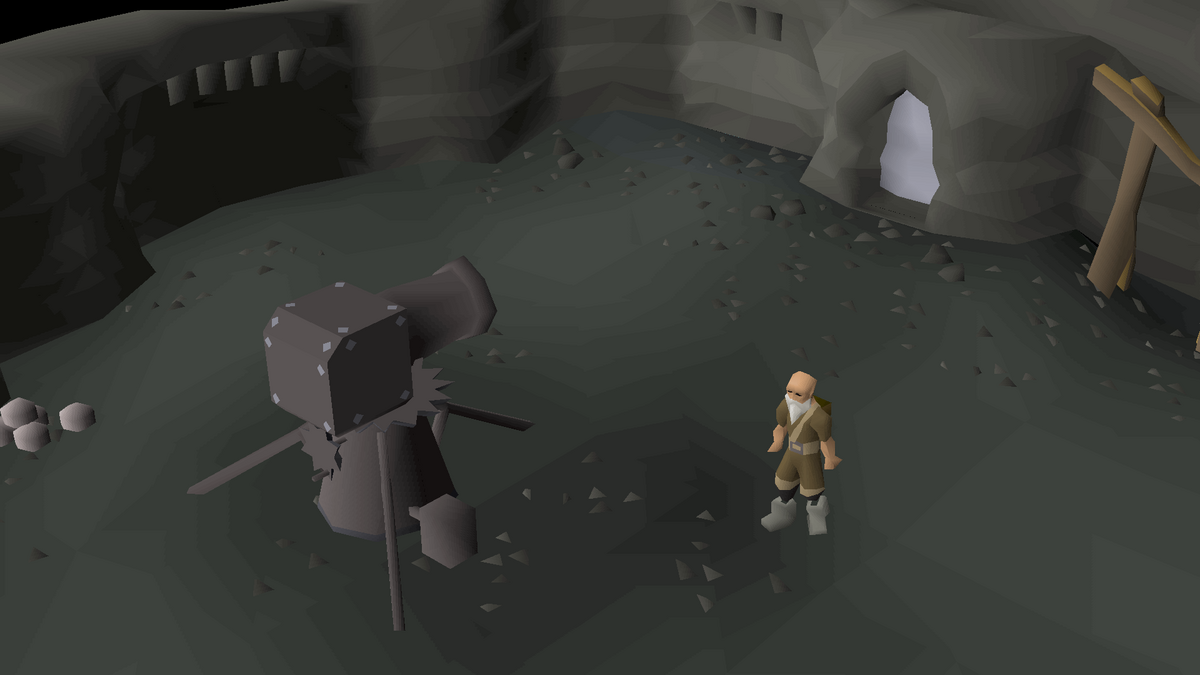
Barbarian Assault Tips For Getting Zerker Helm
Before you go, we’re going to give a few tips for Barbarian Assault so that you can get the Zerker helm without spending money. We suggest just buying the item but doing the minigame might be easier if you want to earn a few levels as well.
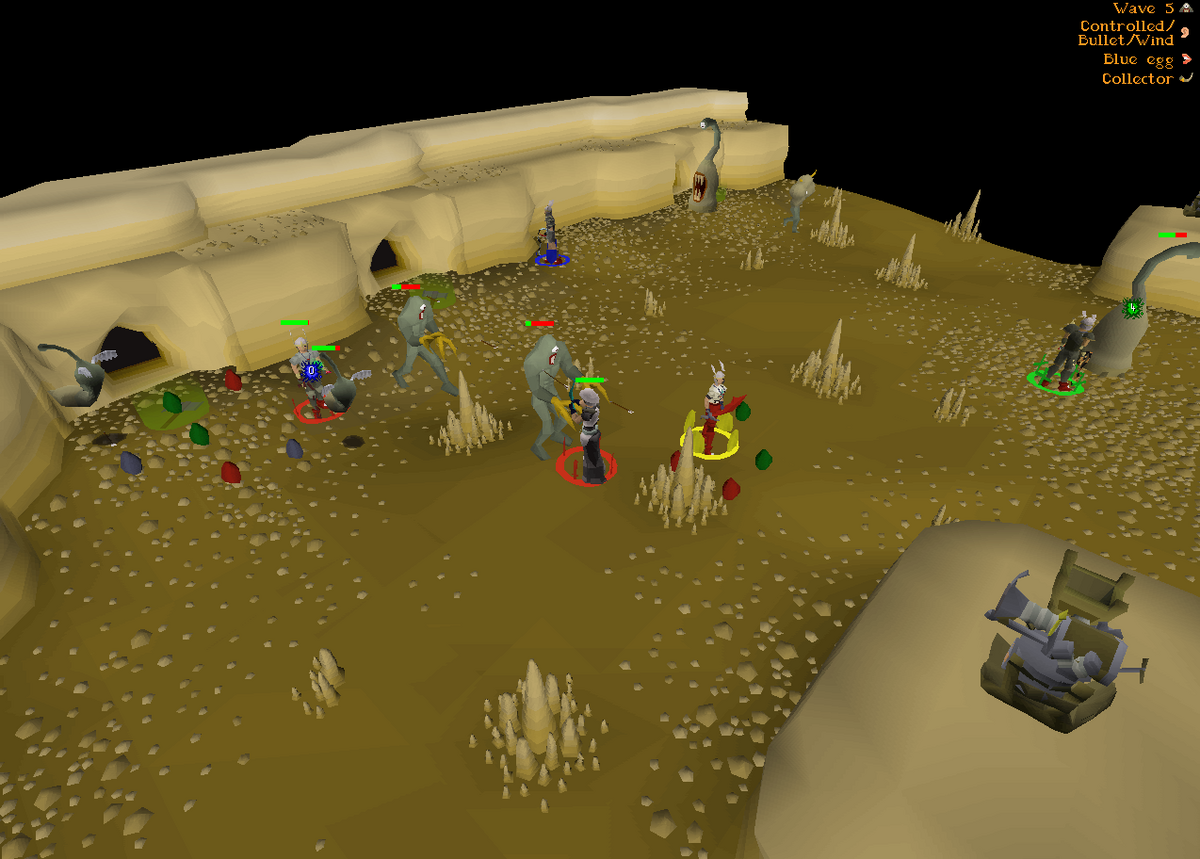
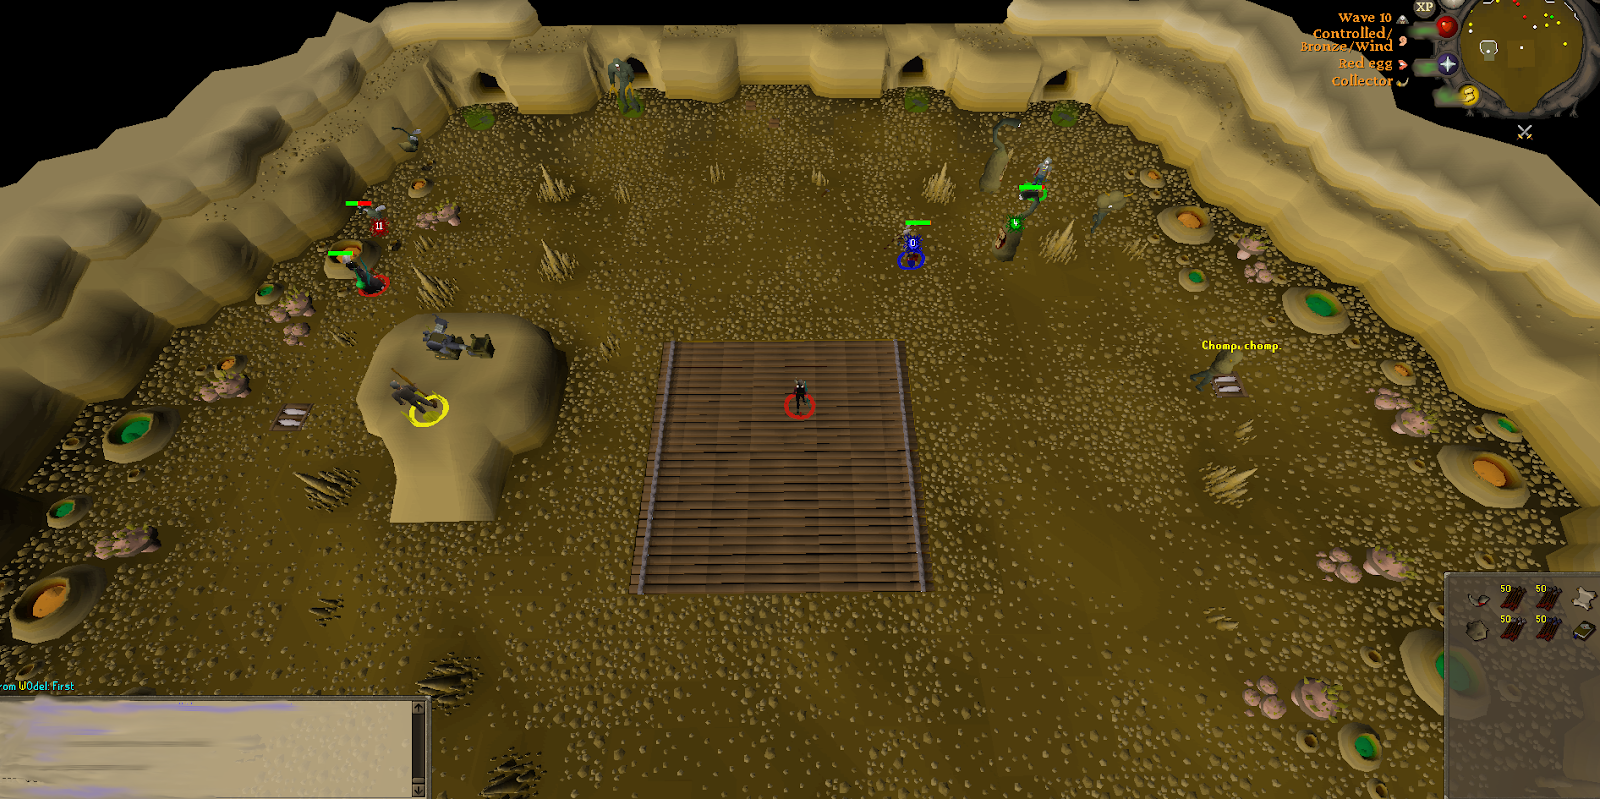
Barbarian Assault is a strategy and teamwork-based minigame where a group of five players is put up against ten waves of the Penance. Each wave increases in difficulty until the last wave, where you're up against the Penance Queen. It's a safe minigame, meaning dying in there will not result in a real death; all that happens is the wave will end.
There are four roles that players can fill: Attacker, who fends off the fighters and rangers; Collector, who is responsible for picking up eggs from the dead Penance creatures and then loading them into the cannon; Healer, who poisons the Penance healers and can heal teammates as well; and Defender, who must kill the Penance runners on the traps on either side of the arena.
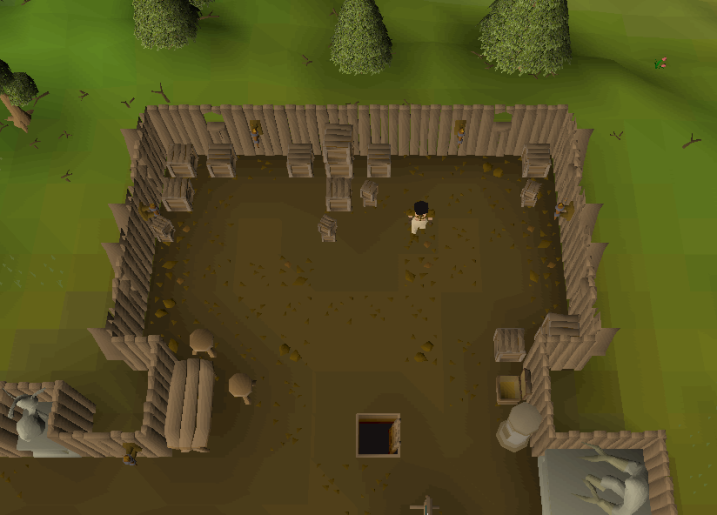
Before you enter Barbarian Assault, you need to complete the tutorial upstairs by speaking to Captain Cain. If you want to skip the tutorial, you can tell him you're an expert. He's found in the Barbarian Long Hall south of the Lighthouse, and the easiest way there is using a game's necklace to the Barbarian Outpost. Once you complete the tutorial, you can use the minigame teleport to get there quickly.
Other than the Berserker Helm, Barbarian Assault allows players to get a Fighter Torso, which provides the best-in-slot strength bonus for the plate body slot, tied with the Bandos Chestplate. Players may also choose to do Barbarian Assault to complete the Elite Kandarin Diary, which requires level 5 in every role.
The Basics
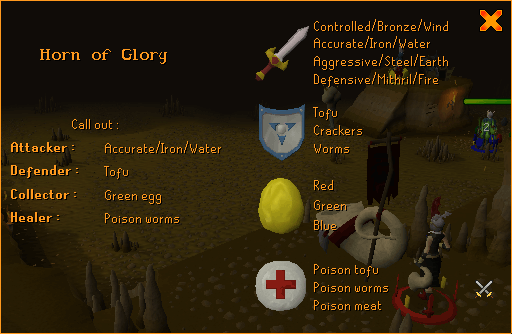
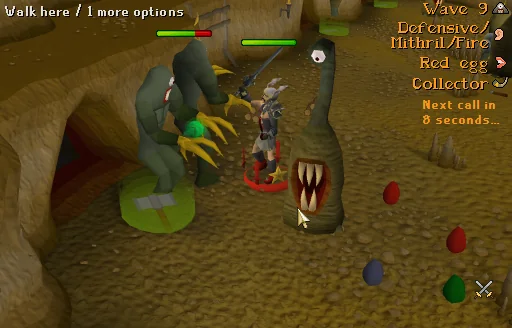
You form a team in the Wave One room on world 306, the official Barbarian Assault world. When you spawn in, everyone spawns in with a horn. In the top right corner, you'll see some white text next to the mouth icon, and every 30 seconds, you need to right-click the horn and call. Once you call correctly, the color will change from white to yellow, indicating a correct call. It's so important to call quickly for your team's coordination.
Above this is the call for you; this indicates what you need to do for your role. If you don't switch to the new call, your whole team loses points. The scroller is the leader of the team, and they pick up a scroll off the table at the start of the round. It's usually best to have the scroller as an attacker because of the spawn locations within the minigame.
In every team, we want to start with two attackers to get through the lower waves. If you're all lower level, then one of the attackers can switch to healer during the later waves to help the team stay alive. To be invited to a team, you'll need to turn on Accept Aid unless you're an Ironman, then you don't have to.
If you've already played Barbarian Assault before or your team has to reset, then you can right-click the first door to reset your wave. It's a good idea to turn off Auto Retaliate so you don't get pulled across the map and accidentally attack with the wrong styles. If you're a defender, healer, or collector, you can hide your NPC attack options in the settings, which is very useful so you don't accidentally click on the fighter or ranger while you're playing.
After each wave, you don't need to wait for the countdown; you can right-click the ladder to quick start to enter the wave. When you first begin in the arena, you gather your supplies at the dispensers: for attackers, you get arrows; for healers, you get poison food; for defenders, you get bait; and as a collector, you don't need the dispenser at the start of the round.
If you want to change roles, then you can leave and re-enter the wave while in the waiting room so that the scroller can add you back to the team, but try to organize this beforehand to avoid confusion. Once you've gotten all your points, do not leave your team halfway through; you should ask to switch roles or continue to finish the Queen.
At the end of each wave, you're given the option to level up your role; leveling up dramatically improves how efficiently you can play in that role. If you're going for a torso, though, it's not recommended to level up.
Role Strategies
As we’ve said, there are four roles: Attacker, Collector, Healer, and Defender. we’re going to be doing them in order from least difficult to most difficult.
Attacker
As an attacker, at the start of the round, you want to run west of the cannon, and you'll do that on every wave to stay as far away from the east as possible. That's so you don't lure any healers across the map, which helps the healer significantly speed up the wave.
The best option for attackers is using ranged, and ideally, a magic shortbow (imbued) is the best option since it has two special attacks on every wave. Void is the best armor option, although if you don't have void, the best ranged armor, such as dragon hide or Karil's, is the best. Since you're given specific arrows, you can't use blowpipes and crossbows.
It's not recommended to use melee or mage, but if you do need to use melee, use something like a dragon scimitar with all four attack styles. The tip for using ranged is to look at the spell color when the collector calls; the arrows will match the color of the spells, like fire spells will match the red arrows.
If fighters or rangers go east, don't chase them until all of the other rangers and fighters are killed. When you are finished, kill off any of the fighters and rangers that went east, then run straight for the eastern cannon to help shoot red and green eggs to the remaining Penance healers or runners. Don't leave the cannon while you're there because that helps the luring for all the other players.
If you're a low-level, then killing the rangers is best since they deal the most damage. You may also want to take tank armor if you're low level that you can use for the later waves. If your hit points are getting low, you should stand next to one of the cannons so you're not being attacked and wait for the healer to come and heal you.
Collector
As a collector, you want to stay west with the attackers since they are the ones that are producing the most eggs. This also stops you from getting in the way of the healer and defender. Same with the attackers, you want to never pass the spike south of the ranger cave until all of the rangers and fighters are dead.
The most important job is quickly calling for the attackers so they can kill the Penance rangers and fighters. You should be picking up as many eggs as possible corresponding to the correct color. Second to that, you want to be loading as many red eggs as you can into the cannon.
As a collector, the more eggs that you collect, the more points that your team gets, so it's recommended to destroy any blue eggs because you won't be firing these since they don't do much. Destroying them gives more inventory space, allowing you to get more points, so try to load up as many red and green eggs as you can, specifically once the fighters and rangers are dead. And again, don't leave the cannon area to avoid ruining the lures of the healer and defender. Gear-wise, as a collector, if you're low leveled, wearing your best tank gear is the best idea.
Healer
Before you start healing, it's best to fully empty your inventory as you'll need as much space as you can for food from the dispenser. The healer's job is pretty simple: you'll use the poisoned food on the Penance healers. So at the start, you'll use the dispenser to get the poisoned food and run up to the healers as fast as you can on the eastern side.
You should always run on the east side of the eastern cannon and stay east of the runner cave for the first two calls, unless you're healing your teammates. This is to help keep the healers close to you, and you'll be able to poison the newly spawning healers very quickly. After wave three, there are reserved healers that only come out when another healer has died, so a good trick to get the reserved healers to spawn is to simply target one healer and use four or five foods on them while poisoning the other three as they spawn.
Then during the second call, you can re-poison any healers ticking at a three or less and use the remaining food on the newly spawned reserve healers that aren't yet poisoned. For each call, you want to finish all of the good food. If you don't have the correct food during the third call, then you can shift-click and delete any remaining food and restock back at the dispenser. This is also the best time to fill up your vial if you want to heal any teammates.
If your team is very experienced, you won't need to heal anybody, although with a bit less experience, it's likely you'll need to heal some people on wave nine or ten. It's very important to avoid the trap and not walk through the defender because this ruins his multi-kill, which results in a lot more time spent in the wave. So be very careful when poisoning healers that are on the defender.
Defender
This role is usually the most difficult for new players, but once you understand how it works, it's actually one of the easiest. Again, before starting defender, it's best to empty your bag since you'll need as much space as you can.
As a defender, you need to understand good food versus bad food. The food that the healer calls you is good food, and when you drop that, the Penance runners will run towards it, eat it, and continue running. The other two foods are bad food, which will cause runners to go back where they came from, which can be very useful for re-luring stray runners.
Once you drop food, it will always remain good or bad from the moment that you drop it, regardless of whether or not the calls change. So you want to be calling at the start of each wave to ensure you're dropping good food. Once you see the runner spawn, you'll want to use the trap on the left or the right, depending on which side they spawn on. Then you want to drop good food for them to lead them to the trap, then you drop more food directly onto the trap to cause them to eat the trap, then they'll die and respawn on the same side. Once the runner respawns, you can repeat this strategy by dropping food to lure them to the trap again. This is called multi-killing, and it's the best way to complete the waves quickly.
There are different strategies for higher waves, such as dropping logs to repair the traps that sometimes break. If you're quick, you can use this to kill multiple runners. The key strategy is to get the timing right, where you can drop food and logs quickly. Additionally, understanding the pattern of runner spawns and how they react to food placement is crucial. Ground markers and specific drop placement strategies (such as the 1-4-1 drop placement) can be very effective in higher waves. In wave 10, for example, you'll use three or more food types in specific placements to ensure the runners are efficiently trapped.
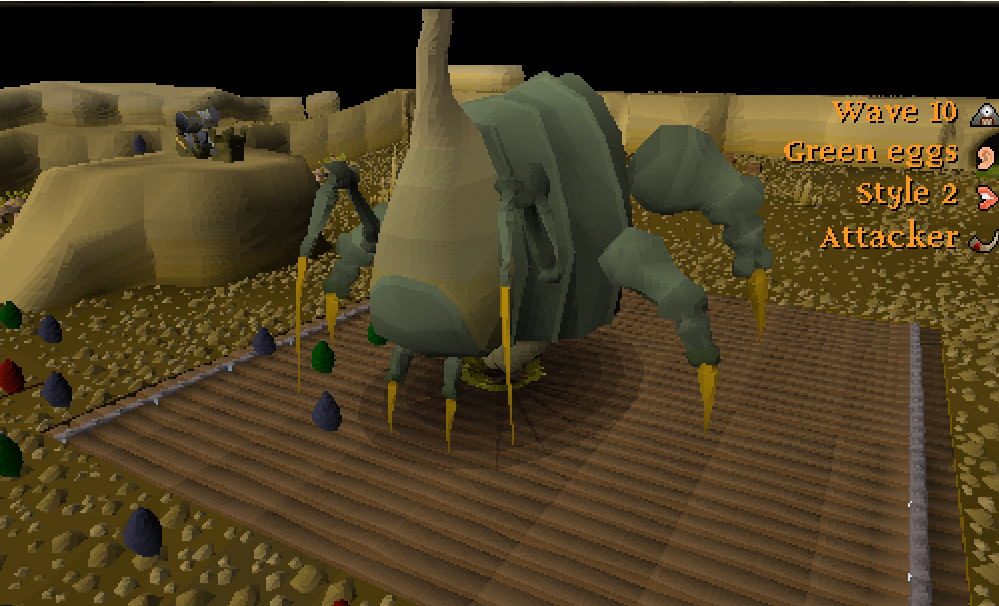
The Penance Queen
The Queen spawns on wave 10 after all other NPCs are dead. The team must fire eight Omega eggs at the Queen to kill her, and the creation of the Omega egg follows the CHAT acronym: Collector -> Healer -> Attacker -> Defender -> Collector. One egging can also be used to kill the Queen with a single Omega egg by rapid clicking during the firing tick. Preload the cannon with a regular egg before the Queen spawns, and the scroller should use animation stalling to delay egg deletion. Forced spawning techniques for the yellow egg minimize damage taken from the Queen.
Build A Zerker Now
Zerkers are easily one of the best account builds for PvP. There are a lot of ways you can customize builds like these and what we’ve shown above is just a small part of a bigger picture. Hopefully, you can create an OSRS account that will truly dominate in PvP soon.
![OSRS Gold (1M) [⏱️ 5-10 Min via In-Game Trade]](/img/tmp/product_mini_2_2939.jpg?time=1743511845)
![OSRS Services [Achievements, Fire Cape, Infernal Cape, Minigames, PvM, Raids, Quests]](/img/tmp/product_mini_2_52597.jpg?time=1743511845)

![Twisted Bow [OSRS Item]](/img/tmp/product_mini_2_3337.jpg?time=1743511846)
![Scythe of Vitur (Uncharged) [OSRS Item]](/img/tmp/product_mini_2_4419.jpg?time=1743511846)