


OSRS Void Pure Guide
14.07.2024 - 12:25:40
Game Guides , OSRS Guides , OSRS PvP , OSRS Quests & Achievements , OSRS Skills & Skilling , Runescape

In OSRS, the Void Set is beloved by many as one of the best armor sets in the game thanks in part to its versatility. Creating a void pure for OSRS might sound difficult but it’s doable and indeed challenging. Before discussing this build for your character, let’s talk about what’s a Void pure first and why it’s such a popular build.
What is a Void Pure in OSRS?
Like any other Pure build, the Void Pure focuses on limiting combat stats to a minimum. In this case, the Attack and Defense are kept at 42. 42 for Defense so that the Void Knight can be used, and at least 42 for Attack so that Rune weapons can be used. If you want a better weapon, you can go above and beyond 42 Attack.
The goal is to make sure that your combat level is as low as possible so that when you’re matched with PvP players around the same level, you can deal seriously great damage to them. As with any other build in the game, there are a few pros and cons to creating a Void Pure. Before you start a Void Pure, it’s often better to have an account where you’ve experienced most of what the game has to offer already. Before you start creating one, here are a few things to consider.
Void Pure Advantages
High Damage - The low combat level and use of the Void Knight equipment makes this build excellent for dealing damage. If you’re able to keep your combat level really low, you can easily destroy other players in PvP.
Low Combat Level - Again, the build has combat level. This is one of the main benefits of many combat pures. Keeping the combat level to a minimum will give you an advantage against players who have regular builds or those who don’t use any build in particular.
Best For High Level PvP - In most cases, Void Pures are best used in high-end PvPs. There’s not a lot of other Pures in the high level that can contend with Void Pures and you only really have to worry about those that have the same build as you. In cases like that, it’s down to a matter of who’s mastered the build the most.
Void Pures are excellent against Ranged Tanks as they can either have the same Defense or a lower Defense level compared to yours. However, you generally want to avoid Ranged Tanks from around level 80 onwards as they get harder to kill. You’d want to avoid tank battles as much as possible at the higher end of combat levels.
You can do wonders while doing PvP activities at level 30-70 onwards. However, mid-level PK’ing from level 30 to 70 can be quite dangerous as these are filled with Pures. Void Pures can have a hard time against other types of pures.
Void Pure Disadvantages
Not Versatile - The main problem with builds like these is that they aren’t versatile in terms of switching up combat styles. As you want to keep your combat level to a minimum, it’s likely that some of your combat skills are going to be very weak and not useable in PvP. While these accounts are also useable for PvE, it’s best to use them for PvP.
Hard To Build - Pure builds are hard to build since you’ll need to do specific combat training methods to get the right skill levels. There are some websites that sell pre-built accounts like these.
PvP Struggles Sub 70 Combat - Fighting within or below the 70 Combat level line is rather risky for Void Pures. In most cases, the characters you go up against will have more power than you. You’re going to heavily struggle within this level but things will be significantly better once you reach level 75 Combat and above.
When it comes to Void Pures, it’s unlikely that you’ll have the chance to go through low level PK’ing. Unfortunately, you won’t have time to practice this build on lower risks PvP first. If you want to practice a bit, you’re better off using a different account to practice with instead.
Where To Get Void Knight Set
It’s ironic to call a Void Pure set as being not versatile enough considering that the set itself is one of the most versatile in the game. What makes it such a good center of attention for Pure accounts is that the entire set can boost your defense equally. It doesn’t have any attack penalties, meaning it can be well-balanced in terms of defense and offense.
Whether you’re looking to create a melee, ranged, or magic character, the Void Knight set can pretty much be used as star of the build.
The attack bonus it gets will depend on the helmet you wear to round out the set.
To wear the set, you’ll need 42 on all Combat Stats. It will also require level 22 Prayer which shouldn’t be too hard to get.
Getting the Void Knight set is rather hard since you’ll need to do Pest Control.
Pest control is one of the least favorite mini-games of the community. It's not enjoyable for most people as it forces you to pay just enough attention that you can't completely AFK it,
With all that in mind, we’re going to give you a quick guide on doing Pest Control. This won’t be in-depth but it should be enough to make the entire journey more bearable.
Requirements & How to Get There
The one nice thing about Pest Control is that you only have to have your combat level above level 40 to start. There are actually three level thresholds in total, but you should always do the highest one you can because you end up getting more points. You also want to be on world 344 for quick, consistent groups.
Getting there is pretty simple too. You can take a pest control mini-game teleport for free, but if it's not available for some reason, you can buy a pest control teleport off the Grand Exchange which is pretty cheap.
How to Do Pest Control
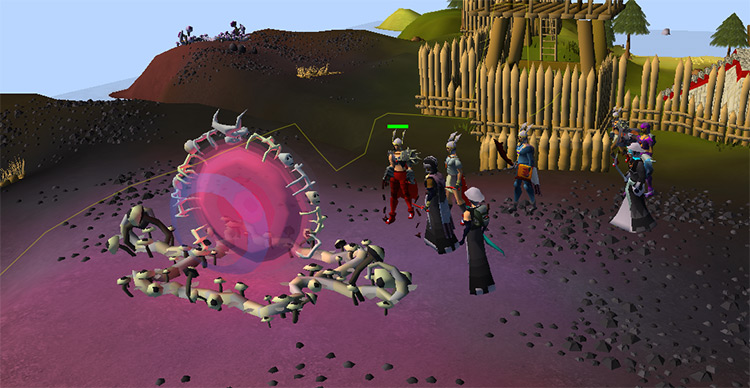
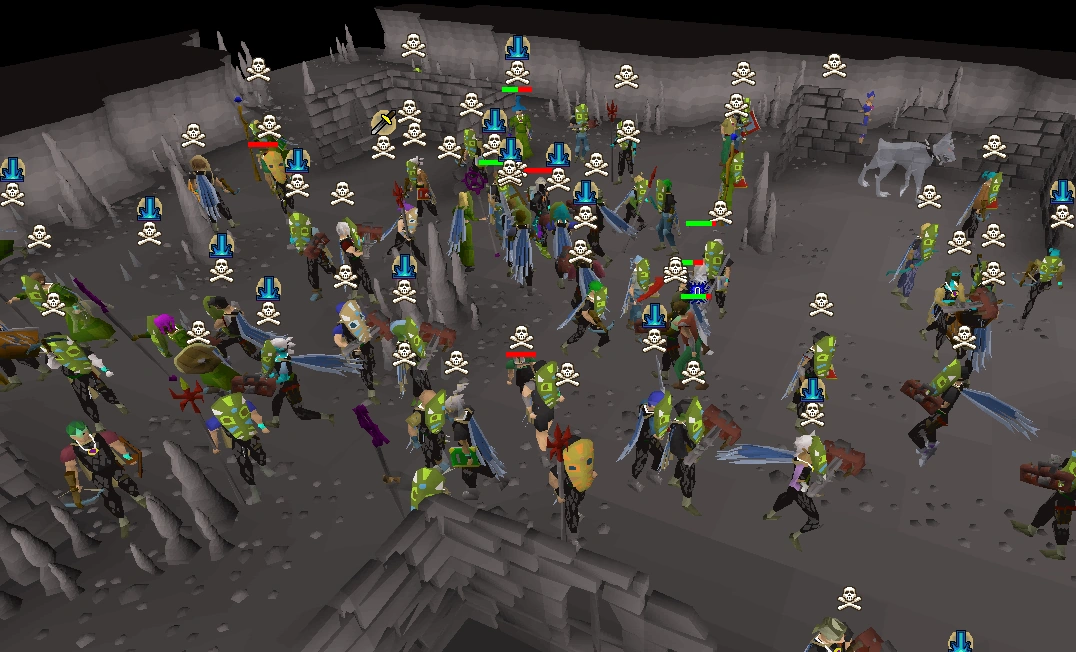
Once you start a game, you can make your way onto the boat level of your choosing. A game will start when it fills up with enough players. When the game does start, your boat is going to float you over to this island. You'll find a void knight in the middle that you need to protect. If he dies at any point, the game is over, and you're going to receive nothing.
Being a knight defender is definitely the choice option for runs as you can just sit around and attack anything that gets too close to your senpai. Of course, everyone wants to do this, and you're not likely going to be able to as it's going to be very overcrowded. But if you don't see anyone sitting there, you can be one of the lucky few who get to enjoy this premium experience.
This is also probably a good time to mention that there's going to be an activity bar when you're in the game. If it completely drains and turns red, you're not going to get any points for the run. As long as you're attacking stuff and not being a leech, you'll be fine. Also, this mini-game is a safe death, so you don't need to worry about dying.
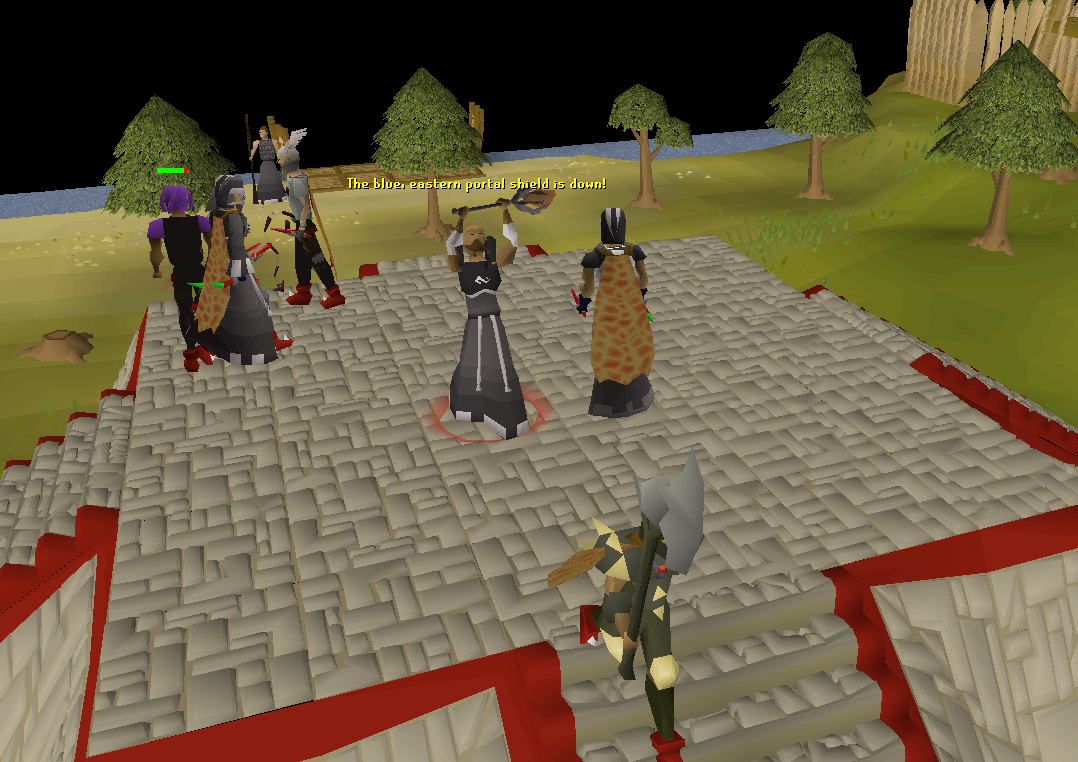
Now, if you're not defending the knight, there are going to be four portals around the map that you need to destroy. Each portal has a color and a combat weakness that you want to get intimately familiar with. These portals aren't going to be immune to damage until you're given the okay by the void knight. It'll show up in your chat box. RuneLite is also going to be a real bro and let you know which one you're able to attack. Attacking portals as their shields drop should almost always be your top priority.
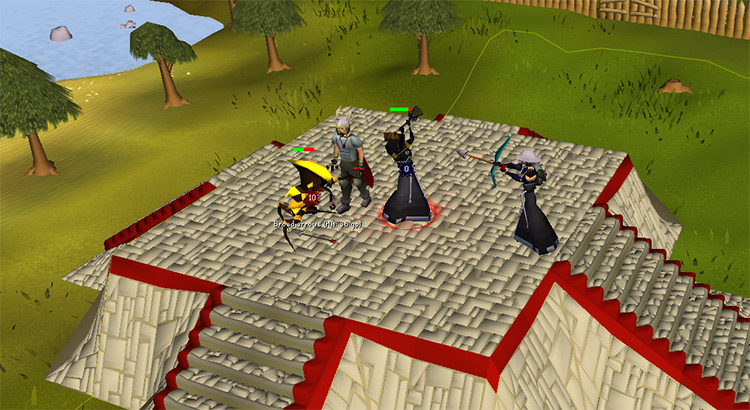
These portals will also be spewing out a few different mobs. Now, if you see a spinner, you always want to kill them. They usually heal the portal faster than you're able to damage it. Other than that, don't worry about the rest of them. The only reason you want to hit one of these guys is if you're waiting for a portal and you just want to keep your activity bar up. I do want to mention super quick that you can't walk through these guys. You'll have to manually path around them, and these guys will explode when they die, so you don't want to be around them.
That's actually it. Once you take out the portals, the game is over. You can queue up to do it another few hundred times until you have all the void you need.
Gear
When it comes to gear, keep it as simple as possible. You might think that you need to take all three combat styles because of the portals, but you don't. Honestly, you could just go with melee, but some players like to bring a four or six-way range switch too. If you’re feeling lazy, just bring a godsword and change the attack option on it to crush when you need to hit the red portal.
This still leaves the magic portal to deal with, but honestly, you don't want to spend the money on runes for this, and you can still occasionally hit with melee. With everyone attacking it, you'll still be able to take it down.
Of course, you can bring as many switches and as much gear as you want. Just don’t stress about min-maxing on this one. Full rune with a snakeskin switch and basic weapons will be more than okay with how many people are in the game at once. Seriously, do not buy expensive gear just for this mini-game. Your inventory will only consist of what gear you bring. Besides maybe showing one more random gear setup, that's all we have to say about what you need to bring into the encounter. Here are a few things to keep in mind:
Focus on the spinners when you see them.
Shut the doors if you're the last one out.
Be sure to turn on offensive prayers because you get your prayer refilled after every match.
How To Create A Void Pure
Creating a Void Pure is very similar to creating a Zerker account. The main difference are a few of the stats of course. Zerkers don’t also need Ranged as much and they’ll need to do more quests. The end goal stats for both builds are rather similar especially once you reach the higher levels.
Questing
There are quite a few quests that are highly recommended for this build. Each of them is important not just for the XP, but also for the rewards you get for them. Here’s a table for an easier read.
To start off as a Void Pure in OSRS, we recommend focusing first on non-combat skills and Magic while in F2P. This approach allows for efficient preparation of the account without risking manual training. For non-combat skills, consider using a bot for a level 3 account to quickly raise these stats, then transition to training Magic to a level suitable for members' activities. Doing this in F2P minimizes the risk of an account ban, and it shouldn't cost more than 500k.
Magic Training (1-60)
Begin with basic spells such as strikes and progress through wind bolt, curse, and optionally superheat (requires 15 Smithing or completion of The Knight's Sword quest), ending with high alchemy. All these tasks can be accomplished in F2P locations like Barbarian Village and Varrock's caged monk. This phase is crucial as it unlocks teleports, significantly speeding up your training later on. Aim to achieve at least 45 Magic. (OPTIONAL: In members, consider using teletabs, although costs can add up!)
Transitioning to Members
Once non-combat stats or Magic reach desired levels, acquire membership and begin questing and training. Aim for Magic levels between 45-60 and keep combat levels under 30. Now, focus on advancing Attack and Strength. Complete quests designated as "Combat Quests" in any order that suits your strategy. They are structured to maximize experience and teleport benefits, helping achieve about 45+ Attack and 30 Strength. Note: The Grand Tree quest requires prior Agility training.
Training vs Questing
By this stage, there should be around 60 Magic, 44 Attack, 30 Strength, and most F2P non-combat skills completed. Decide whether to continue training or switch to questing (or alternate between the two).
Questing
Decide whether to pursue Prayer.
Opting for Prayer: Complete relevant quests now.
Skipping Prayer: Focus on skilling and completing remaining quests for items like climbing boots, the prayer book, most mithril gloves subquests (excluding Dave), and travel quests. While not essential without Prayer, having the prayer book proves beneficial later on. Avoid starting Ancients, Monkey Madness, or attempting the Fire Cape at this stage.
Keep in mind that you have a ton of other quests to do listed above. While not all of them are necessary, make sure to squeeze them in between your training sections so that you can get access to the awesome rewards from doing them.
If you’re not going to do all of the quests, you should at least do the Dwarf Cannon so that you’ll have access to the Dwarf Multicanon which will be an important part of the Ranged training for this build.
Training
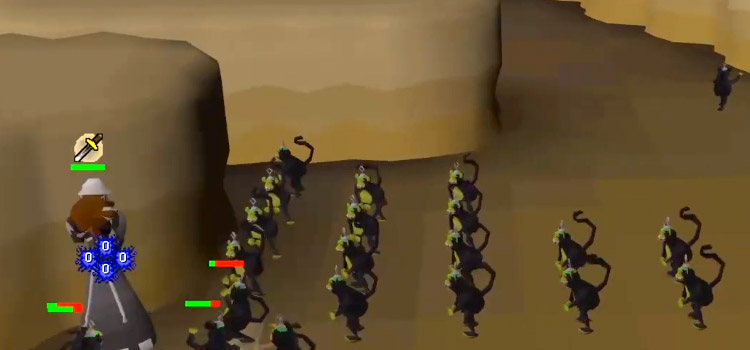
Begin training the Ranged skill. Use a cannon to rapidly advance Ranged to at least 40 (around 1,000 cannonballs should get you to 30 Ranged). Equip the best bow/crossbow and arrows for the highest Ranged bonus with each level, as cannon accuracy relies on attack bonuses. Creatures with low defense, like Ogres, rock crabs, or monsters easy to safespot in multi-combat areas, are ideal choices.
Upon reaching 30 Ranged: Obtain the attractor/accumulator.
Between 40-50 Ranged: Switch to knives/darts and train at locations such as experiments, rock crabs, or caged ogres (upgrade your attractor at 50 Ranged). Nightmare Zone (NMZ) with a magic shortbow (I) and rune arrows or RCB/broad bolts is also effective beyond knives. Keep in mind that low HP relative to your combat level can pose problems for PKing and questing if you continue with knives.
Alternate training between Attack and Strength, keeping Strength levels consistently higher for effective PKing (e.g., 40 Attack 60 Strength -> 50 Attack 70 Strength -> 60 Attack 70 Strength).
Advanced Ranged Training
To train Ranged using chinchompas, start Monkey Madness and use them in the tunnels before quest completion. This method requires 43 Prayer and delays acquiring a dragon scimitar. Here’s a reference table for Chinchompa XP.
Final Preparations
As stats approach readiness (adequate HP survival and sufficient combat stats for kills), proceed with completing more challenging prerequisites:
Complete Mithril Gloves (Evil Dave subquest): Delayed initially due to the Shadow of the Storm quest's formidable boss, which targets accurately with low initial HP.
Mage Arena: Manageable, but mages can inflict significant damage if not safespotted, so maintain higher HP and be vigilant of PKers.
Ancients: Manageable with knowledge of boss mechanics. Refer to online guides for strategies without relying on Prayer if you opted against it.
Monkey Madness: More monotonous than challenging, with the final boss either safespotted or taken down easily with or without Prayer. Let the gnomes weaken it before using your special attack or stronger weapons to finish the job.
Fire Cape: For Void Pures, it may require purple sweets and/or a blowpipe. Achievable with
Void Pure PvP And PK’ing Tips
Using this Void Pure build is going to be useless if you don’t follow the right techniques for combat. Here are some things you need to consider when using this build.
When it comes to PvP, it is generally assumed that there is a difficult barrier of entry to actually start peeking, making it essentially worthless to try to even get into the peeking seen as a beginner. While it is true that the skill gap is definitely wider than it used to be even just a few years ago, it is still relatively easy to get into PvP once you understand the basic mechanics of it
Gear Setup
Book of Law + God Book
Firstly, equip the Book of Law and Sara book for a +10 range attack bonus. Obtain the Book of Law from the Horror from the Deep quest. Rune knives (P++) are your go-to ranged weapon for their effectiveness over Dragon darts.
Amulet and Accessories
Opt for the Amulet of Glory for its benefits over the Amulet of Power. Bring 6-8 Dragon arrows, an Ava's accumulator from Animal Magnetism, and full void from Pest Control. Snakeskin boots provide affordable and effective footwear.
Ring of Recoil Tip
Check your Ring of Recoil by right-clicking and selecting "break" to ensure it's fully charged before heading into battle.
Inventory Setup
Combat and Defensive Gear
In your inventory, carry a D'hide set and a Rune Kite Shield. Switch between them during combat to balance offense and defense. Bring Sharks for primary healing, Karambwans for combo eating, and Saradomin Brews for emergency health boosts.
Potions and Supplies
Include Super Restores alongside Super Defense potions. Bring 15-25 Ranging potions (4-dose), Dragon bolts (enchanted), and an Amulet of Glory. A Stamina potion helps sustain long sessions of PvP.
Preparation and Strategy
Pre-Battle Preparations
Before engaging, prepare with Extended Antifire and Antidote++ potions to defend against dragon bolts and poison attacks from opponents.
Tactical Approach
Void peeking is aggressive and fast-paced. Time your Vengeance spell just before expected hits, then swiftly switch to the Dark Bow for a powerful combination attack.
F-keys Setup and Learning from Streams
Set up your F-keys for quick gear and prayer switches. Watch PvP streams for live-action examples and to learn different strategies from experienced players.
Practice 1-ticking
1-ticking is a pretty big mechanic in PvP since it effectively gives your opponent no time to react to your special attacks. Since the special attack weapon is visible at the same time you use your special attack weapon, it really isn't too difficult to understand 1-ticking with most spec weapons aside from the G Maul.
To effectively 1-tick, all you have to do is click on your spec weapon, then F-key over to your special attack screen, click special attack, and then finally click on your opponent. When doing this, you have to wait for your main weapon to finish its attack cycle. For example, if you're using a weapon such as a whip or a dragon scimitar, which are both 4-tick weapons, then you have to wait for 4 ticks or 2.4 seconds until the next hit will occur.
Instead of hitting it with your whip or dragon scimitar again, this is when you would perform the one tick. Depending on your latency and your connection to the server, generally speaking, it will take about half a second for all of this to take place, so you have to test it a few times until you get a comfortable feel for it. Once you get a comfortable feel for it, you should be able to get it every single time.
For this mechanic as well as every other mechanic, we recommend doing this with a friend or in World 2 where most people just kind of hang out. Then you can test this effectively as much as you want because once you get the timing down, it's relatively easy to understand.
Eating In PvP
Eating in PvP is very important since it is the difference of living or dying. The general rule of thumb to follow for beginners is to understand what your opponent's special attack weapon is, what it can hit on average, and what its max hit is overall. If your opponent has a max hit of 60 with an AGS, then it's important to keep your HP at around at least 60.
Anything below that will open you up to being one-hit at any point in time. Although, if you don't really risk as much, maybe you risk 50-100k, you don't really mind dying, then it's fine to keep your HP lower.
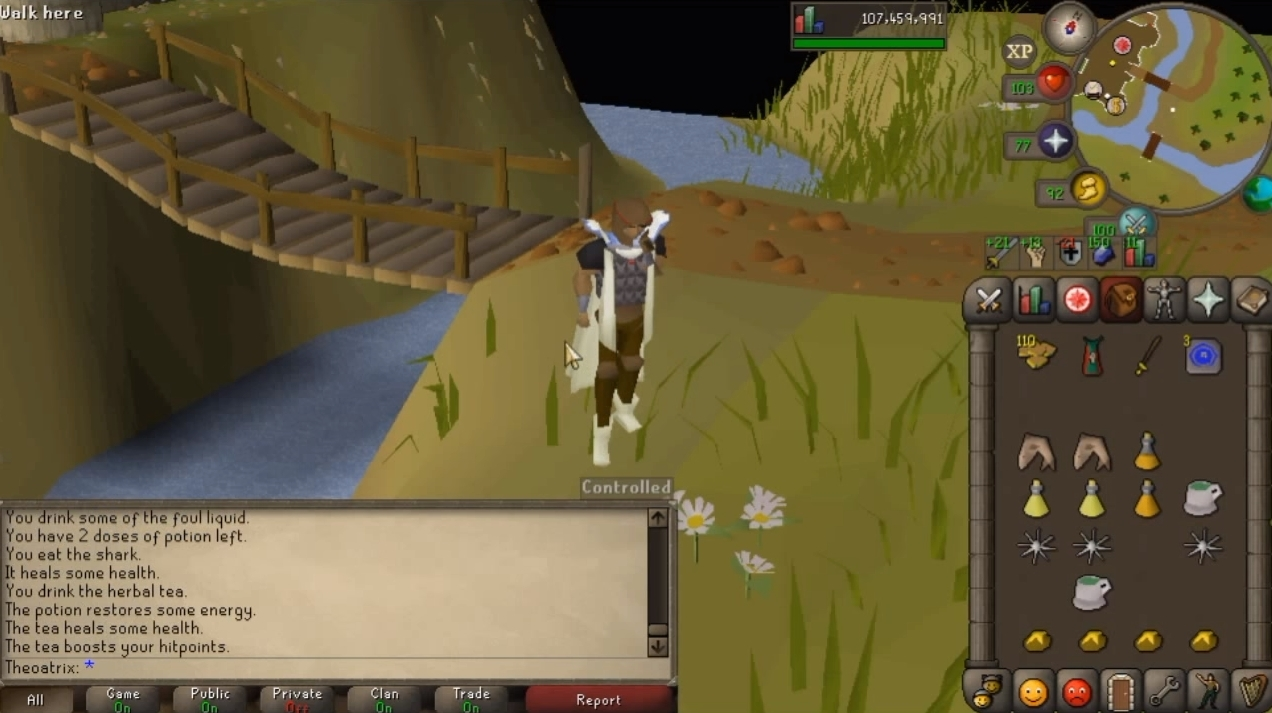
But in bigger risk fights where you actually don't want to lose the GP that you have, it's relatively important to keep your HP at around at least 60, minimizing the chance that you will die in one hit. If you're getting hit for a lot of damage repeatedly, then you're gonna want to eat your combo food, a shark, then a brew, then a karambwan.
If you're only getting hit for a medium amount of damage, you'll want to eat a shark and then a karambwan. If you're only getting hit for a little bit of damage and you're below that threshold where you could die in one shot, then just eat a shark and bring yourself back up.
PvP Items Worth Getting
The items that are worth having on a pure and that you should go for are going to be the decorative range top and the halo from Castle Wars, as well as getting Mithril gloves, climbing boots, and a fire cape.
You could, of course, customize it with a bunch of different items, but generally speaking, these are the basic items that you want to have.
Depending on if you're going to use magic at all when you PK, of course, we recommend your stats to be as close to 99 as you possibly could have it, but if you want to go peeking beforehand, at least have these stats.
Ready For PvP?
Void Pures are an excellent PvP account build for OSRS. It’s very challenging yet rewarding to do. There are lots of other PvP builds out there and we’re going to tackle more of them moving forward. Keep in mind that there are a lot of ways to create a build like this so don’t be afraid to experiment.
![OSRS Gold (1M) [⏱️ 5-10 Min via In-Game Trade]](/img/tmp/product_mini_2_2939.jpg?time=1743135303)
![OSRS Services [Achievements, Fire Cape, Infernal Cape, Minigames, PvM, Raids, Quests]](/img/tmp/product_mini_2_52597.jpg?time=1743135303)

![Twisted Bow [OSRS Item]](/img/tmp/product_mini_2_3337.jpg?time=1743135304)
![Scythe of Vitur (Uncharged) [OSRS Item]](/img/tmp/product_mini_2_4419.jpg?time=1743135304)