
OSRS Ranged Pure Guide
14.07.2024 - 13:24:25
Game Guides , OSRS Guides , OSRS Quests & Achievements , OSRS Skills & Skilling , Runescape

There are many types of Pure accounts in OSRS and if you’re a big fan of the game, we highly suggest testing out each one. In this guide, we’re going to help you build the perfect Ranged Pure. Before anything else, let’s talk about what Ranged Pures are and what makes them so different from others.
What Is A Ranged Pure?
This is a type of Pure account that’s focused on Ranged training. You can train Ranged without restriction but you’ll have to keep your other combat stats as low as possible to prevent your Combat Level from going up.

Ranged Pures are rare, especially in F2P worlds. You can be at a disadvantage when creating a Ranged Pure on these worlds since you can’t use the Ballista or high-tier crossbows. On a typical setting, Ranged Pures on an F2P account isn’t recommended but they’re still made because they can be helpful in multicombat situations.
Despite the limitations, Ranged Pures still have a high damage output.
Gameplay
Similar to regular Ranged builds, a Ranged Pure heavily relies on maintaining distance. This is even more important considering that Pures like these have low defenses.
While in multicombat fights, it’s best to use shortbows in a rapid attack setting. This will let you maximize your damage as much as possible. It’s worth noting that the rapid attack setting isn’t viable for PvP because it’s much less flexible compared to the other attack types.

Ranged Pures are excellent at ragging. If you’re not familiar with this, this is fighting players who aren’t willing to engage in PvP. You can typically do this within the Wilderness area.
Ranged Pure Advantages
High Damage Potential
Some of the strongest ranged weapons in the game, like the Magic Shortbow (MSB), Rune Crossbow, and Blowpipe, are available to Range Pures. With their powerful weaponry and quick attack speeds, Range Pures are extremely difficult to defeat. Rapid-fire shots with the Magic Shortbow's special attack can swiftly overwhelm opponents. The Rune Crossbow can deal extremely powerful blows, particularly when paired with enchanted bolts like Dragonstone or Ruby Bolts (e). The Blowpipe can provide steady, high damage and is well-known for its speed and venom effect.
Range Pures can attack consistently, even against foes with excellent defense, by focusing on Ranged skill, which also gives them exceptional accuracy. Gear and ammunition bonuses, such as ranging potions and specialized equipment like the Archer’s Helm or Robin Hood Hat, improve the accuracy of ranged attacks even further. Ranged pures are dependable damage dealers because of their exceptional precision, which minimizes missed shots and maximizes damage output.
Flexible In Combat
Range Pures are able to switch between numerous types of ammunition and ranged weapons in order to adapt to different combat situations. Their adaptability enables them to take advantage of their opponents' weaknesses and modify their strategy quickly. For instance, they may switch to the Rune Crossbow with enchanted bolts for longer-range encounters or utilize the Blowpipe for quick, high DPS (damage per second) in close combat.
Range Pures are particularly good at hit-and-run strategies because of their ability to attack from a distance. They are able to do damage, engage enemies from a safe distance, and then retreat to elude counterattacks. They are hard to contain because of their mobility, which also gives them the ability to dictate the fight's tempo. Hit-and-run strategies work especially well in PvP situations where placement and mobility are critical.
Low Combat Level For PvP
Range Pures can keep their combat level lower than builds that invest in numerous combat stats because they are just focused on ranged skills. Because of this decreased combat level, opponents may underestimate Range Pures' capabilities, providing them with a tactical edge. When paired with a strong damage output, the element of surprise can lead to swift and decisive triumphs over unsuspecting opponents. Range Pures can also participate in lower-tier PvP battles with a lower fighting level, where they can outclass less experienced opponents.
Wide Gear Options
Range Pures can equip themselves with a variety of items to improve their ranged skills, like the Armadyl Crossbow, Ranger Boots, and Robin Hood Hat. Major gains in damage and accuracy are offered by this gear. Both accuracy and damage output are further improved by items like the Void Knight outfit, which has ranged bonuses. With the help of this specialized gear, Range Pures may unleash the full power of their ranged skills and give their best in combat.
Range Pures' combat capabilities are further improved by the assortment of ammunition at their disposal. Enchanted bolts, like Ruby Bolts (e) and Dragonstone Bolts (e), enhance attacks with unique effects that boost damage and offer more utility. Blowpipe arrows with poison tips have the potential to shoot venom that gradually damages targets. Range Pures can maximize their damage output and efficacy by customizing their ammunition to meet the unique requirements of each fight thanks to this variety.
Ranged Pure Disadvantages
Very Vulnerable
Due to their often low Defense level, Range Pures are vulnerable to severe damage from magic and melee attacks. To prevent getting hit, one must move constantly and position carefully to take advantage of this vulnerability. If an opponent approaches a Range Pure too closely in PvP, they might quickly drain their health with powerful melee or magic attacks.
Range Pures can launch strong attacks, but because of their "glass cannon" nature, they may also be easily killed if their defenses are compromised. This fragility necessitates careful and calculated play because even small errors can result in serious health consequences. To properly manage combat, Range Pures must rely on their placement, mobility, and distance management.
Costly Training
Effective range training necessitates the use of high-level ammunition and equipment, both of which can be costly. Specialized equipment and items like Rune and Adamant arrows are quite expensive. Creating a Range Pure requires striking a balance between these expenses and the requirement for efficient training techniques. You need to carefully consider your training plans in order to save costs and optimize experience gain.
The best combat performance from a Range Pure depends on striking a balance between Ranged, Hitpoints, and other required skills. Concentrating on one ability at the expense of others can result in imbalances that compromise effectiveness as a whole. You need to schedule your training properly in order to guarantee that all necessary skills are constantly developed.

Heavy Need For Ammo
Range Pures' ability to deal damage is heavily reliant on their ammunition. During battle, the effectiveness of high-level ammunition—like poison-tipped arrows or enchanted bolts—can be greatly reduced by running out of them. Because of this dependence, maintaining a consistent supply of ammunition for extended conflict demands careful resource management.
High-level ammunition, including poison-tipped arrows and enchanted bolts, can get expensive over time. These costs can mount up in extended battle situations, which affects your capacity to maintain efficient combat. You need to weigh the necessity for steady damage output against the expense of high-level ammunition.
Weak To Magic
Because of their low Magic defense, Range Pures are especially susceptible to magic attacks. This vulnerability can be exploited by enemies with strong spells, who can do substantial damage from a distance. Due to its vulnerability, Range Pures must exercise caution when managing distance in order to stay away from mage attacks. Although its weakness can be somewhat mitigated by using protection prayers and equipment with Magic defense bonuses, it is still quite difficult to overcome.
The effectiveness of a Range Pure’s attacks can be significantly reduced by opponents who employ protection prayers or high Ranged defense gear. Significant defense against ranged attacks is offered by items like Karil's armor and Dragonhide, and damage is further reduced by protection prayers like Protect from Missiles. These strategies compel Range Pures to change and find strategies for getting past their opponents' defenses.
How To Build An OSRS Ranged Pure
Now comes the important part - building your very own Ranged Pure. This part of the guide shows what important quests you need to do, as well as training methods for your Ranged skill.
Training
Now let's move into the pathways to 99. We're going to start off by showing some low-level training methods, then we'll show two pathways to 99: the fastest experience and an AFK pathway. The fastest XP pathway takes as little as 22 hours for 99. It costs 112 mil if you use black chinchompas, and it costs less than half if you use grey or red chinchompas.
The AFK pathway takes 105 hours and costs 4 mil. We recommend following both pathways and switching depending on whether you want to AFK or not. After the two pathways, we're also going to talk about slayer ranged training, bossing with ranged, and some free-to-play methods.
Low-Level Training
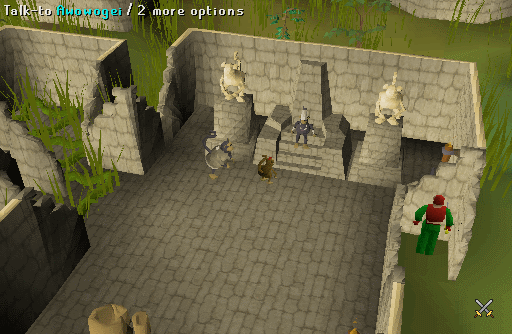
At a low ranged level, leveling up is incredibly slow if you attack monsters normally. So, it's strongly recommended to complete quests for your early levels. The Temple of Ikov quest can get you from level 1 straight to 27 ranged. In the quest menu, it says you need 40 ranged to complete Temple of Ikov, but you can bypass this requirement by using darts or knives while having ice arrows equipped. In the description, we've linked a quest guide that shows how to bypass the requirement.
Another quest you can complete from a low level is Horror from the Deep, and this grants 4.6k ranged XP. It requires 35 agility, and you'll need a decent magic level to kill the Dagannoth Mother. If you completed the Temple of Ikov first, you'd get to 31 ranged after Horror from the Deep.
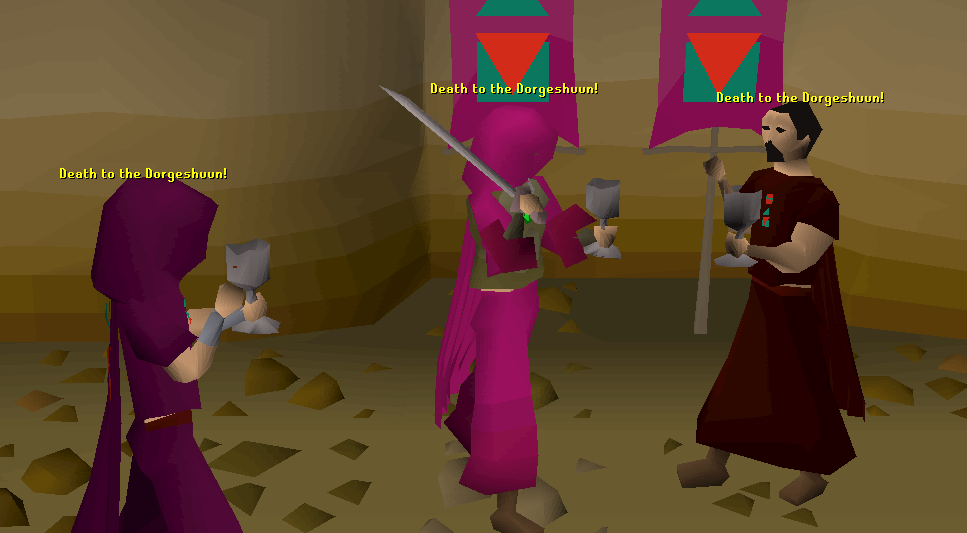
Death to the Dorgeshuun is another quest that gives ranged XP with low requirements. You need 23 thieving and agility, plus The Lost Tribe quest. If you did the previous two quests, you'd be at level 32. If you would prefer to train normally instead of questing at a low level, there are two methods: crabs and cannoning.
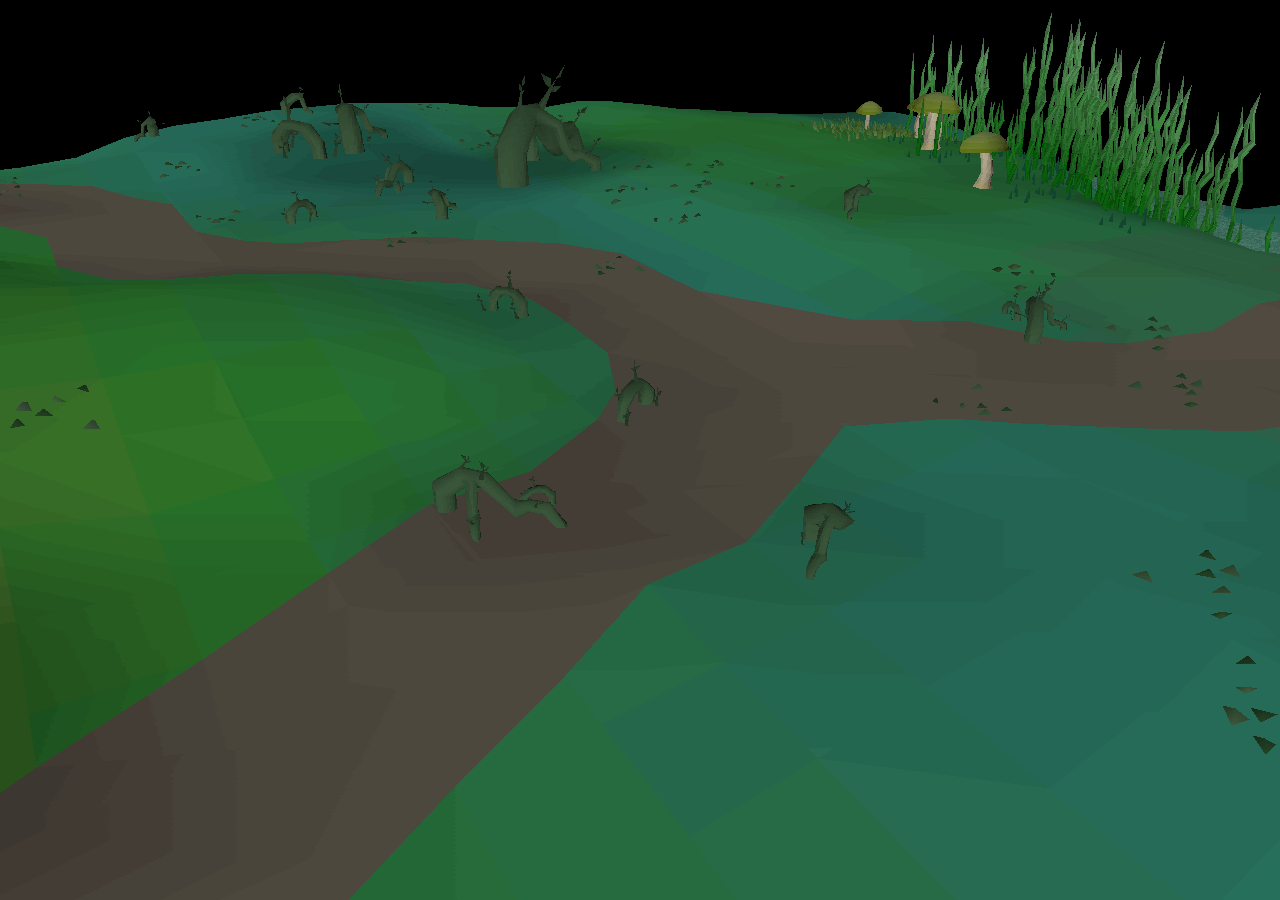
There are four types of crabs in OSRS, and they all have similar bonuses, except swamp crabs have a negative ranged defense bonus. This makes them the best for low-level ranged training. Swamp crabs are found in Morytania.
Alternatively, sand crabs are a good option for fresh accounts, and there are many locations to find these.
So the other low-level method is cannoning, and even at level 1 ranged, you can get over 100k XP per hour, which is very fast. There are a few places you can cannon. You could go to ogres near Castle Wars, or there are caged ogres available after Biohazard. Or you could go to rock crabs with your cannon, or Dagannoths in the lighthouse are one of the fastest cannon spots in the game.
If you want to save some money while you cannon, there are a few cost-effective cannon locations. You can cannon ice trolls for various rune items and granite shields, overall making you break-even. Or you can cannon scabarites after the Contact quest, and these drop alchables, herbs, and seeds.
Fastest Pathway
Now let's get into the fastest pathway to 99. As mentioned, this pathway takes 22 hours and costs around 112 mil. So you start off cannoning from a low level, then you'll be chinning all the way to 99 at high XP rates. You can choose to use grey or red chinchompas all the way to 99 for slower XP rates but at a far lower cost.
At level 1, you'll want to complete the Dwarf Cannon quest, which has no requirements. Then get your hands on a cannon from the Grand Exchange, and some cannonballs. To get from level 1 to 45, you'll need around 2000 cannonballs.
Something to keep in mind while using a cannon is that your cannon's accuracy is based off the attack bonus of your current attack style. So it's best to wear your best gear and weapon when using a cannon.
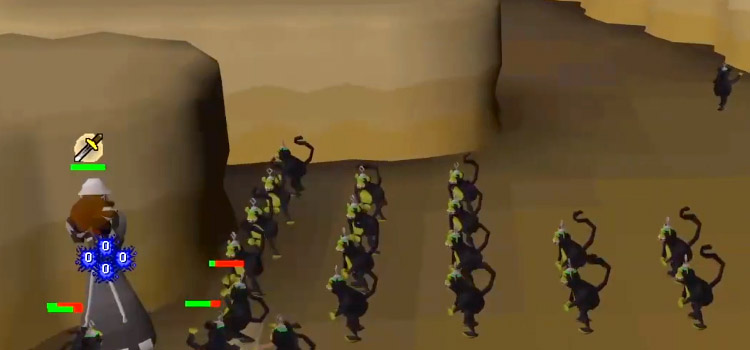
At 45 ranged, you can wear grey chinchompas, which are the fastest method until red chinchompas and black chinchompas. There are two places we suggest chinning at. The first is the Monkey Madness 1 tunnels, where there are skeletal monkeys. And the other is the Monkey Madness 2 tunnels, where you can find maniacal monkeys. Both caves require you to almost complete the Monkey Madness quests to access them. These are the XP rates you can expect.
At a low level with grey chins, you're going to see XP rates of around 250k per hour, which is really fast. At high ranged levels and with black chinchompas, you can reach over 1 mil XP per hour. It's important to keep in mind that the Monkey Madness 2 tunnels are faster XP per hour since there are a lot more monkeys there. So if you're chinning in the Monkey Madness 1 tunnels, you might need more chins.
Grey chinchompas are the most cost-effective but give the slowest XP rates. Although if you want to train at a lower cost, you'll still level up really fast with grey chins. Overall, if you went from grey chins to red, to black, it's going to cost 112 mil, but will only take 21 hours from 45 to 99. In terms of armor, these are the best setups to use. It's important to prioritize ranged strength bonus as well as prayer bonus, although having a high ranged attack bonus does help. This makes elite void the best setup to use, followed by Masori and Armadyl.
At low levels, just use the best d'hide you can, as well as monk robes or god vestment robes for prayer bonus. This is what you should bring in your inventory. It varies depending on whether you go to the Monkey Madness 1 tunnels or Monkey Madness 2. In the Monkey Madness 2 tunnels, you don’t need to bring many prayer potions with you since the monkeys drop prayer potions, and you can use the bonecrusher.
You shouldn't use the bonecrusher in the Monkey Madness 1 tunnels because the skeletal monkeys spawn from bones that are left on the ground. You should also bring divine ranging potions for the best XP rates, and you'll also need a light source for the Monkey Madness 2 tunnels.
This is how you navigate the Monkey Madness 1 tunnels. You start by using the Ape Atoll teleport spell, or you can use the tablet available off the Grand Exchange. It teleports you right inside the tunnels, close to where you'll be chinning. So from the teleport location, you follow the tunnels for about 1 minute, until you reach an opening with skeletal monkeys.
Walk around to get the monkeys aggressive to you, but avoid the spike traps on the floor. Then, once they're aggressive, stand on this tile. Here, you'll avoid damage from the falling rocks in the cave. To stack up the monkeys, you can run between these two tiles. After some time, the monkeys lose aggression. To reset, you can run back the way you came and then return.
For the Monkey Madness 2 tunnels, you should start by teleporting with your royal seed pod, then head up to the gnome glider on the top floor. From here, take the glider to Ape Atoll. Then you head south into the trapdoor in the grass.
Head south, then east, and here you follow the path you took during Monkey Madness 2, until you reach the green circle. Here, you enter another cave, then you run east, all the way to the open area with a lot of monkeys. Then, you run to a corner of the room, and to stack up the monkeys you run back and forth around a corner. Once they're stacked, you can start chinning. After some time, the monkeys will stop being aggressive. To reset, just run back towards where you entered the cave, then run back.
AFK Pathway
Now let's get into the AFK pathway. On this pathway, you'll start off training at crabs, then at a higher level you'll move to the Nightmare Zone. At level 80, the Venator Bow becomes the fastest AFK training method.
So, from level 1 to 70, or from level 1 to 99 if you're a pure, the best way to AFK is at crabs. You can AFK for 10 minutes at all types of crabs. If you want to learn more, skip back to the low-level training section of this guide.
If you find that those standard crab locations are too busy, you can complete the Depths of Despair quest to access the crabs in the Crabclaw Caves. Or, you could pay 10k to go to Crabclaw Isle, which is usually less populated. It's going to take approximately 25 hours to get from 1 to 70. We strongly suggest having Ava's device if you're planning to AFK at crabs since it allows you to use better ammo without losing much money.
At level 70 ranged, you should head to the Nightmare Zone. Here you'll get better XP rates, and if you start at 1 hitpoint and drink a lot of absorption potions, you're able to AFK for 20 minutes before you stop attacking. When training ranged in the Nightmare Zone, you should set the monsters to normal mode, not hard, since the hard monsters have a high ranged defense. You need at least five of these to be able to start a custom Nightmare Zone session. So at level 70 ranged, with NMZ, you should see around 70k XP per hour. At level 90, you'll see around 90k per hour. You should use a blowpipe in here for the fastest XP. But if you want to save some money, a rune crossbow with broad bolts is very good. For pures, we recommend you avoid the Nightmare Zone and stay at crabs.
Now, if you want to get better XP rates while AFK training at higher levels, you should switch to the Venator Bow at level 80. This bow becomes better XP per hour at 80 because of its passive effect, where every third shot splits into five shots that target nearby enemies. This effect means it works best where enemies are in multi-combat zones and stack on top of each other.
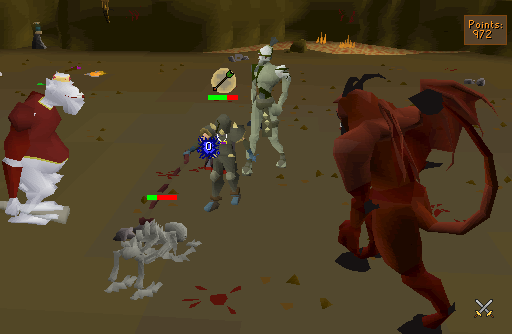
So for ranged training, you'll get the best XP rates in the Catacombs of Kourend. Here, you can find a spot with three greater demon spawns. If you find that this spot is taken, you can also go to the Hellhound spot. It's going to take around 100 hours to get from 80 to 99 at these locations. For pures, you can use the bow in the Monkey Madness 1 tunnels or for AFK Slayer training.

Training with Slayer
Training ranged with Slayer is very common, and if you follow the Slayer skill all the way to level 99, you'll end up getting around 20 mil XP in other combat skills. You could choose to start training Slayer at a low level, and this would get you from 1 to 99, while also making a lot of money in the process. For Slayer ranged training, we recommend using a cannon as much as possible to speed up your tasks, but it's important to prioritize what gear you use.
It’s best to use a blowpipe whenever possible. If you're using a crossbow, we recommend you use broad bolts since they're the cheapest for the damage output. For a lot of Slayer tasks, you can use a cannon. The best locations for this are tasks that have a cannon spot in a multi-combat zone. Some examples are dagannoths, kalphites, and suqahs.
For tasks like these, you can see up to 100k XP per hour using a cannon. So you should always prioritize these tasks when you get them, even if you're skipping other tasks.
Some players choose to block tasks with bad XP rates, and some choose to block tasks that have bad GP per hour. Generally, it's best to block the longest tasks. If you use the Venator Bow while training Slayer, you can speed up your tasks a lot.
Some of the best Slayer tasks for this bow are the Abyssal Demons in the Catacombs, bursting tasks like Nechryaels or Dust Devils, and greater demons. For these tasks, if you want to maximize the number of monsters in a stack, you should run between multiple safespots to make the monsters stack up.
Bossing with Ranged
For ranged, you can train up your level by fighting bosses, although this is a lot slower XP than other methods. If you chose to boss all the way to level 99, you'd end up making a lot of GP in the process. There are some bosses that make more money, and some bosses that give faster XP rates. We're going to show you some of the best ranged bosses to train on and how much GP or XP per hour you can expect to see from them.
So the most popular ranged boss is Zulrah. With a low ranged level, you can get around 600k GP per hour and see 40k XP per hour. With a high level, you can make over 2 mil per hour and get over 50k XP per hour. Another good boss is Saradomin. Here you can expect to see 1.5 mil per hour and 80k XP per hour.

Some other bosses with decent GP per hour, but slower XP per hour, are the KBD, Vorkath, and Skotizo. A fast XP per hour boss is the Crazy Archaeologist, and at this boss, you'll see around 100k XP per hour.
Free-to-Play Training
Finally, let's talk about free-to-play. Training ranged in free-to-play is significantly slower XP rates and less GP per hour. So it’s a lot more time-efficient to buy a bond and become a member. Although, if you’re an ironman account, free-to-play can be very challenging.
From level 1 to 20 ranged, you should train at cows, goblins, or monks. From 20 to 40, you can start training on minotaurs in the Stronghold of Security. You could stay here all the way to 99 if you wanted to because they're such low defense. Although, for the best XP rates, you should move to Hill Giants at level 40.
After level 50, you can train at the Moss Giants. Finally, for the best free-to-play XP rates, you should go to Ogres at level 60. These are in the Corsair Cove dungeon, and you should bring high-ranged bonus gear and your best arrows. If you find that the dungeon is too busy, you can also train at the Ogress Warriors and Ogress Shamans, which are in the Forthos dungeon. At this level, you should see around 30k XP per hour. So overall, free-to-play ranged training is going to take around 200 hours to get from 1 to 99.
Questing
Build Your Ranged Pure Now
Ranged Pures has an exciting combat style that a lot of players are more than happy to check out if they have the time. With our guide above, creating your very own Ranged Pure shouldn’t be too difficult. There are lots of other builds out there so don’t be afraid to check them all out.
![OSRS Gold (1M) [⏱️ 5-10 Min via In-Game Trade]](/img/tmp/product_mini_2_2939.jpg?time=1742468634)
![OSRS Services [Achievements, Fire Cape, Infernal Cape, Minigames, PvM, Raids, Quests]](/img/tmp/product_mini_2_52597.jpg?time=1742468634)

![Twisted Bow [OSRS Item]](/img/tmp/product_mini_2_3337.jpg?time=1742468634)
![Scythe of Vitur (Uncharged) [OSRS Item]](/img/tmp/product_mini_2_4419.jpg?time=1742468634)